Monday, October 04, 2010

Documentation, not always the How To Dos

Documentation for me is often just How to do something, but I have been forgetting the WHY part of the equation. For instance, my documentation says to do our weekly maintenance window after 21:30 and to only reboot one particular server after 21:45, but I didn't say why and had forgotten myself. So I started doing the maintenance earlier and at one point rebooted the one particular server at 21:30. This caused the last of our production cron jobs to not run, and thus a customer didn't get their batch for the day.

Now this could have been avoided a few different ways. Since that first time was a mistake any thing that happens after it is a failure on my part, and thus can't happen again.
  1. I could have followed our procedure to the T.
  2. Read my e-mail to see that the cron job hadn't run yet.
  3. Run the cron job by hand after the server restart.
  4. Did all of the precursor work and waited for the cron job to run.
  5. Did all of the precursor work and run the cron job by hand.
I have chosen to go with option 1, follow our procedure to the T. We started doing the weekly maintenance for a few reasons and it was to be done after 9:30, with that one particular server last to ensure this didn't happen. Now once again I have my WHY, and I have it written down so if I question it again I know why.


This is just one instance where the WHY is critical, but there are others. So please when you are writing documentation, and you should be please include the WHY you do something the way you do it. It also helps train the new guy, or your replacement.

Enabling the Administrator user in Windows 7

This is a very simple fix. The reasons to actually log on as the administrator are shrinking, but for my environment I need to log on as the Administrator user occasionally (for software patching).

  1. Open up a command prompt as Administrator (not the same thing we are trying to do)
  2. Run "net user /active:yes administrator"
  3. Now it is a great idea to set a password for the Administrator user so we can do that right now
  4. Run "net user administrator password" but replace password with something more complex similar to "Som3C0mpl3xP@$$w0rd"
  5. Exit out of the command prompt.
For my situation I need to run commands as the Administrator user on other machines and need the Administrator shell. I did a lot of testing to make sure that the "Run as Administrator" doesn't work as I need.

Enabling Ping responses in Windows 7

Out of the box if you Ping a Windows 7 host you will recieve "Request Timed Out". This is because the Windows 7 firewall is blocking ICMP echo requests. If this is causing you problems and you need to open up access to ping requests it is fairly simple.

  1. Go to the "Windows Firewall" in the Control Panel.
  2. On the left hand side click "Advanced Settings"
  3. Click on "Inbound Rules"
  4. Right click on "Inbound Rules" and choose "New Rule"
  5. Select "Custom (Custom Rule)" and press "Next"
  6. Select the (default) "All Programs" and press "Next"
  7. Change the Protocol type from "Any" to "ICMPv4"
  8. Unless you want to restrict the ping response choose the option "Any IP address". (This is for your adapter.)
  9. Unless you want to restrict which hosts can ping you choose "Any IP address".
  10. On the Action screen ensure it is an "Allowed" connection.
  11. Leave all three check boxes check on the Profile screen.
  12. On the final screen, Name, give it a meaningful name such as "Echo Ping Request"
  13. Finally click finish.

Monday, September 13, 2010

How to Reset the Password(s) on a Linksys SRW248G4 Switch

  1. Connect to the Serial port on the back of the switch with a serial cable. (Putty on Windows works well)
  2. The defaults for connecting to the serial port are 38400 baud, 8 data bits, no parity, 1 stop bit, no flow control.
  3. Confirm that you have an active serial connection by pressing enter a couple of times. You should receive a login screen
  4. Once you have successfully connected to the serial port restart the switch by unplugging the power. (Either from back or from the power strip, my preferred method is the back)
  5. The switch will start its POST process.
  6. Look for the line “Autoboot in 2 seconds - press RETURN or Esc. to abort and enter prom.” (Please note: Do not hold down Esc. or Enter. Only press it once.)
  7. You will know that you interrupted the boot sequence when you are prompted with a startup menu. Select option 3 “Password Recovery Procedure”.
  8. The screen will display “The current password will be ignored!”. Press Enter to reboot the switch.
  9. Once the switch has restarted login with the default admin user and no password. This will work on either the terminal or the web interface. Proceed to create / modify users and passwords. This does not reset the rest of the configuration, just user accounts.
  10. Once you have your new credentials reboot the switch again. Document the credentials.
  11. Verify that your new credentials work by logging into either the web interface for the command line interface.
  12. Disconnect the cable and store it safely.
This is the second time I have required these instructions, so I am posting them here for safe keeping. The last time I did this I removed the default account and setup individual accounts, and then promptly forgot everything about it. This is why documentation is so critical.

Thursday, August 19, 2010

Rebuilding the Icon Cache in Windows 7 (and Vista)

If you ever need to rebuild the Icon Cache and dearly miss TweakUI for this duty there are three simple command lines to run and a process to kill and then start.

1. Open Task Manager
2. Kill all explorer.exe processes (but leave Task Manager Open)
3. Open a command prompt
4. type "CD /d %userprofile%\AppData\Local"
5. type "DEL IconCache.db /a"
6. type "Exit"
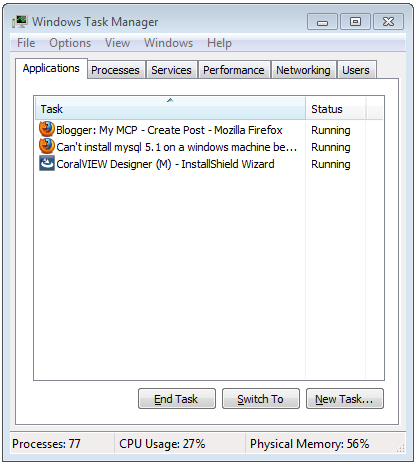
7. Go to Applications Tab in Task Manager and click the "New Task..." button.
8. type "explorer.exe"

How to Enable Windows 7 GodMode

God mode in Windows 7 is similar to TweakUI in Windows XP, but is really simple to setup and requires no installation.

1. Create a new folder.
2. GodMode windowRename the folder to

GodMode.{ED7BA470-8E54-465E-825C-99712043E01C}

(note that you can change the “GodMode” text, but the following period and code number are required).

I create this folder in my home directory.

Wednesday, August 11, 2010

Fixing Adobe Error 148:3 Licensing for this product has stopped working

This is a pretty simple fix. Go over to Adobe's Licensing website and download the License Recovery tool. Run it and follow the prompts.

Before this I had wanted to Repair my installation and went to the Control Panel, but my only option was to uninstall the suite and re-install, so I knew there had to be a simpler way to do it and there was!